Role Management
Define roles and assign corresponding permissions to them, to realize systematic and easy permission management.
- Admin has full permissions of the platform by default.
- System Admin has permissions of organization and user security management by default.
- System Admin and Admin can only manage users and assign permissions to users under the same enterprise.
Adding Role Folder
- Log in to supOS, and then click
 at the upper-right corner to go to the design center.
 - Select User Security Management > Role Management.
- Select a company, click
 next to the search box, and then select New Folder.
 - Enter the name and description of the folder, and then click OK.
Adding Role
- Log in to supOS, and then click at the upper-right corner to go to the design center.
- Select User Security Management > Role Management.
- Select a company or a role folder, click next to the search box, and then select New Role.
- Enter the name, code and description of the role, and then click OK.
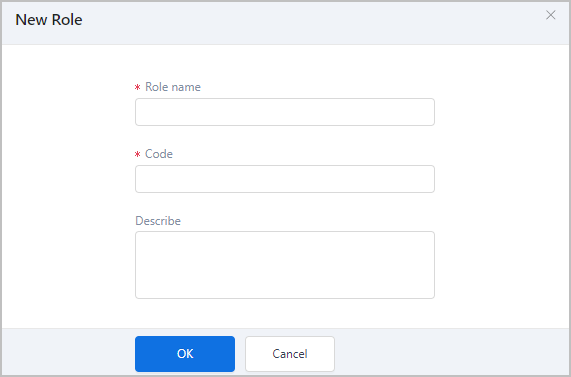
- Point to the role, click
 and then select Setting Permissions to assign permissions to the role based on the role definition.info
For details on assigning permissions, see Assigning Permission.
Importing Roles
- Click Import, and select the import type.
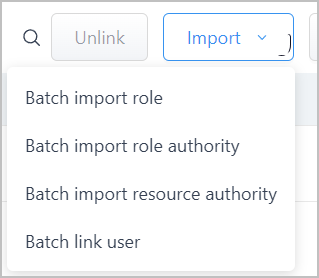
- Click Download File Template, and fill in the template file.
- Click Import again, and upload the filled template. :::info
- Make sure the role code and name exist and match the template content in supOS when importing role permission and resource permissions.
- When unmatching content exist in the template file, import fails and data rolls back. :::
Linking User
Link the role to multiple users, and the permissions of the role will be assigned to the linked user.
- Add employees under Enterprise Organization Structure.
- Link employees to normal user accounts.
- Log in to supOS, and then click at the upper-right corner to go to the design center.
- Select User Security Management > Role Management.
- Select a role, and then click Link User at the upper-right corner.
- Select an employee, and then click OK.tip
Select Show user with no account, and you can see employees who are not linked with any user accounts, which cannot be linked with roles.
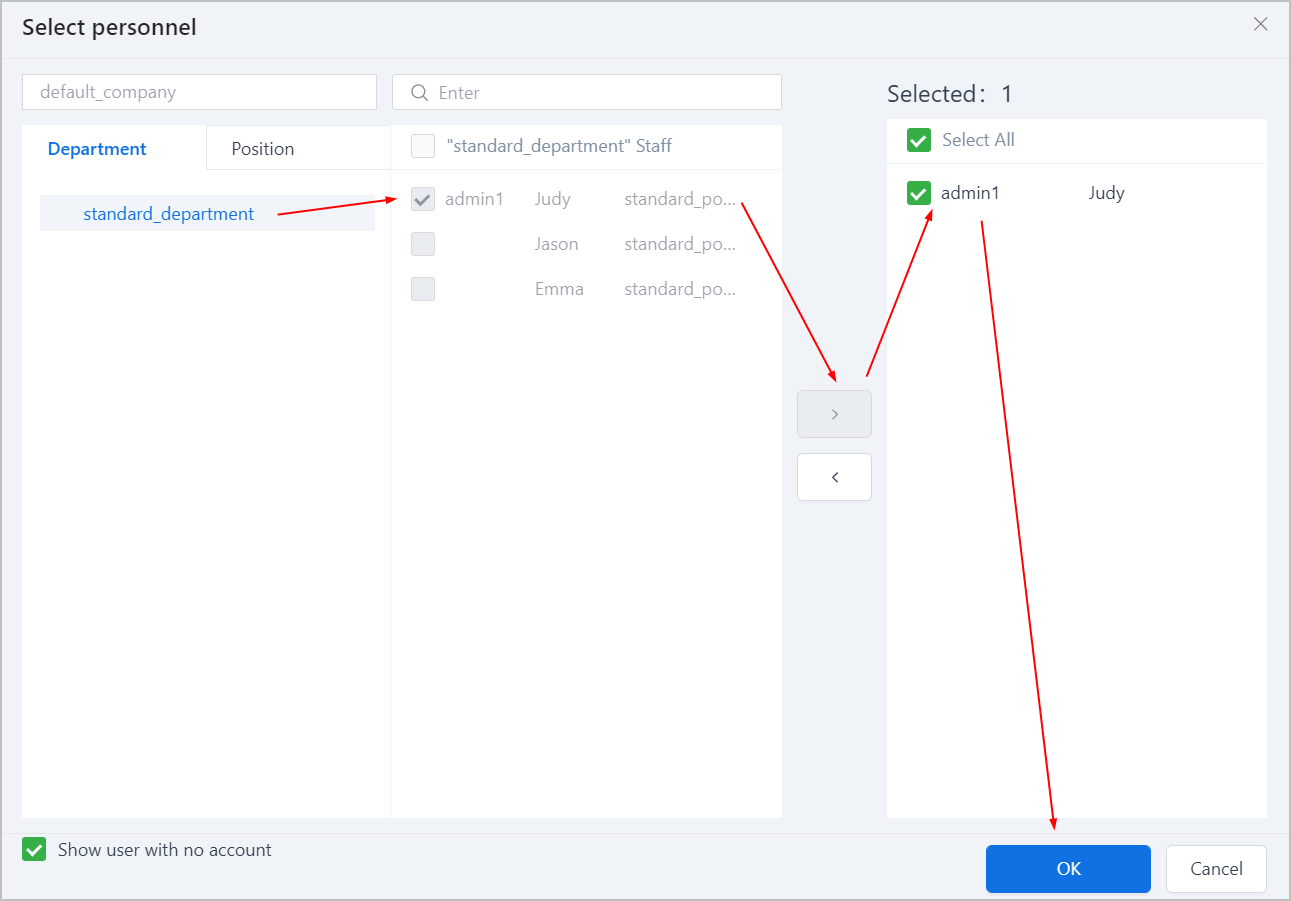
- (optional) Under Operate, click Unlink to cancel the linkage between the role and the personnel.
info
If Unlink is grayed out, you need to go to Organizational Structure > Organization Management > Post to cancel the linkage between the role and the post.