Designing Model
Create table models and map data from the local data warehouse for clear management and subsequent indicator-oriented statistical data integration. There are 3 types of table models:
- DIM: Dimension table.
- DWD: Details data table.
- DWS: Integrated data table.
In this section, the following original table is used as an example to demonstrate the process of modeling.
- product, date and workshop are used as dimensions.
- DWD table contains all details on the table.

Start Entire library migration on X-ETL to migrate the Product table to the local data warehouse. For details, see Migrating Database.
Creating DIM Model
Log in to supOS, and then select Data Intelligence > Data Workshop > Data modeling > Model design.
Select DIM, click
 ,and then enter the basic information on the pop-up window.
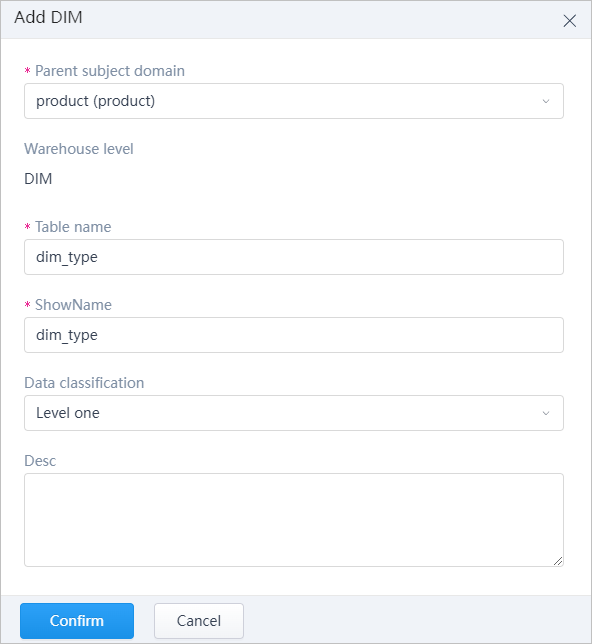
Click Attribute field on the right side, and then enter the dimension attribute.

- On the Physicalize tab, select Associate physical table as physicalization type.
- Associate physical table: Link the DIM model with physical table in local data warehouse.
- Generate physical table: Generate an empty physical table in the data warehouse, which can be filled through data tasks in X-ETL.info
For details, see Configuring Data Task.
- Sync to MQ: Sync changing data to message queue for X-ETL usage.
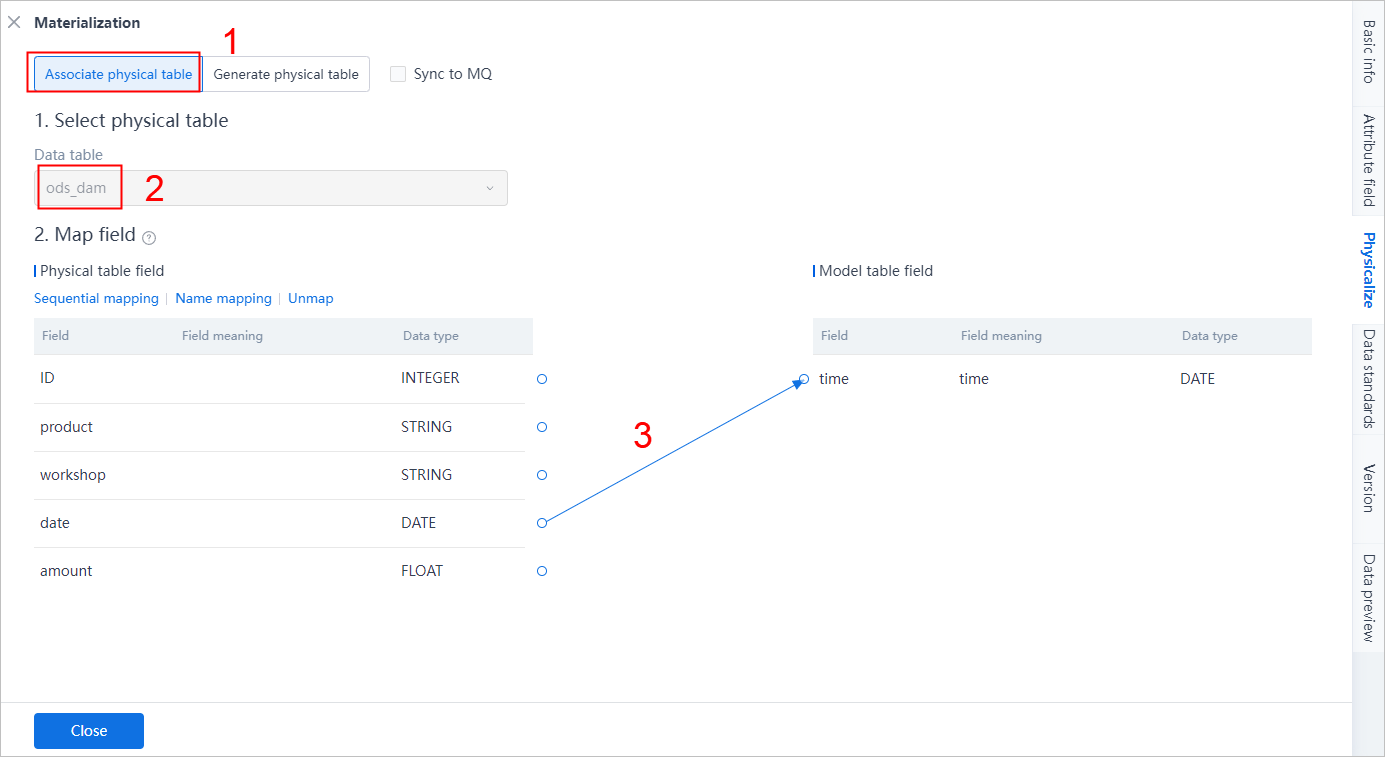
- Select a physical table, and then map physical table fields with the DIM field.
- Sequential mapping: Map same type of fields in order.
- Name mapping: Map fields with the same name.
- Manual manpping: Manual mapping and different types of fields can be mapped with automatically changed types.
- Click Data standards, select a standard to the model to link a standard field.
- Version tab is used to compare model difference after update.
- Data preview is only available after publishing the model and it displays all mapped data from the physical data.
- Close the model detail tab, and then click Save and Publish at the top.
- Repeat step 2 to create 2 more DIM models with product and workshop as dimensions.
Creating DWD Model
Click DWD, similar to DIM creation, add same fields as the physical table and map with it.

Creating DWS Model
- Click DWS, create a DWS model, and then drag all DIM and DWD table to the canvas.
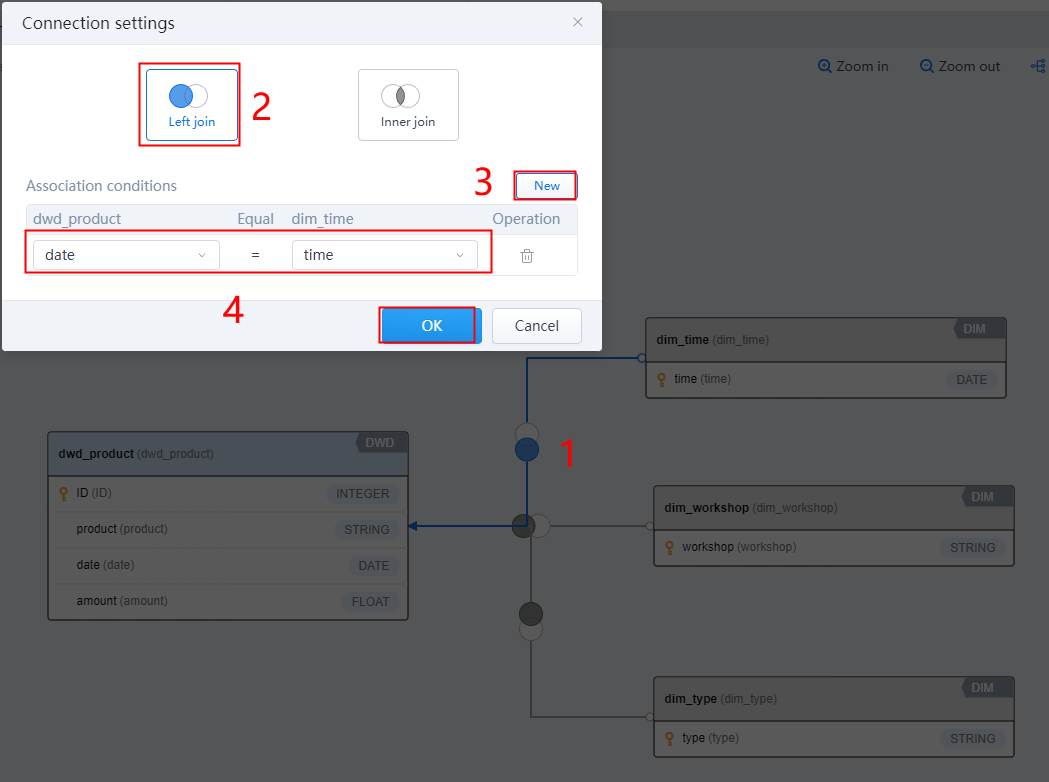
- Draw lines from the DWD model to all 3 DIM models, and then double-click the connection lines and set their link types.
- Left link: Returns all data on the left table and data conforms to the association conditions.
- Inner link: Returns data conforms to the association conditions.
Click New to add association conditions.
infoMultiple conditions are available.
Click Attribute field on the left side, and then check the integrated fields and adjust as needed.
On the Physicalize tab, leave it to Local view.
infoMaterialized view is unavailable presently.
Close the model detail tab, and then click Save and Publish at the top.