Install 3D Designer on supOS and get authentication license before use.
Installing 3D Designer
- Get the compressed installation package from technical support.
- Log in to supOS, and then click
 to go to the design center.
 - Select APP Management > App Runtime Management, and then click Local Installation at the upper-left corner.
- Select the installation package and upload it.
- After the package uploaded, click Start under Operation to start the application.

Assigning Permission
- Select User Center > User Security Management > User Management, find the user you want to assign the application permission to.
- Click User Permission under Operate.
- Under Design Center, find 3D Designer and assign permissions.
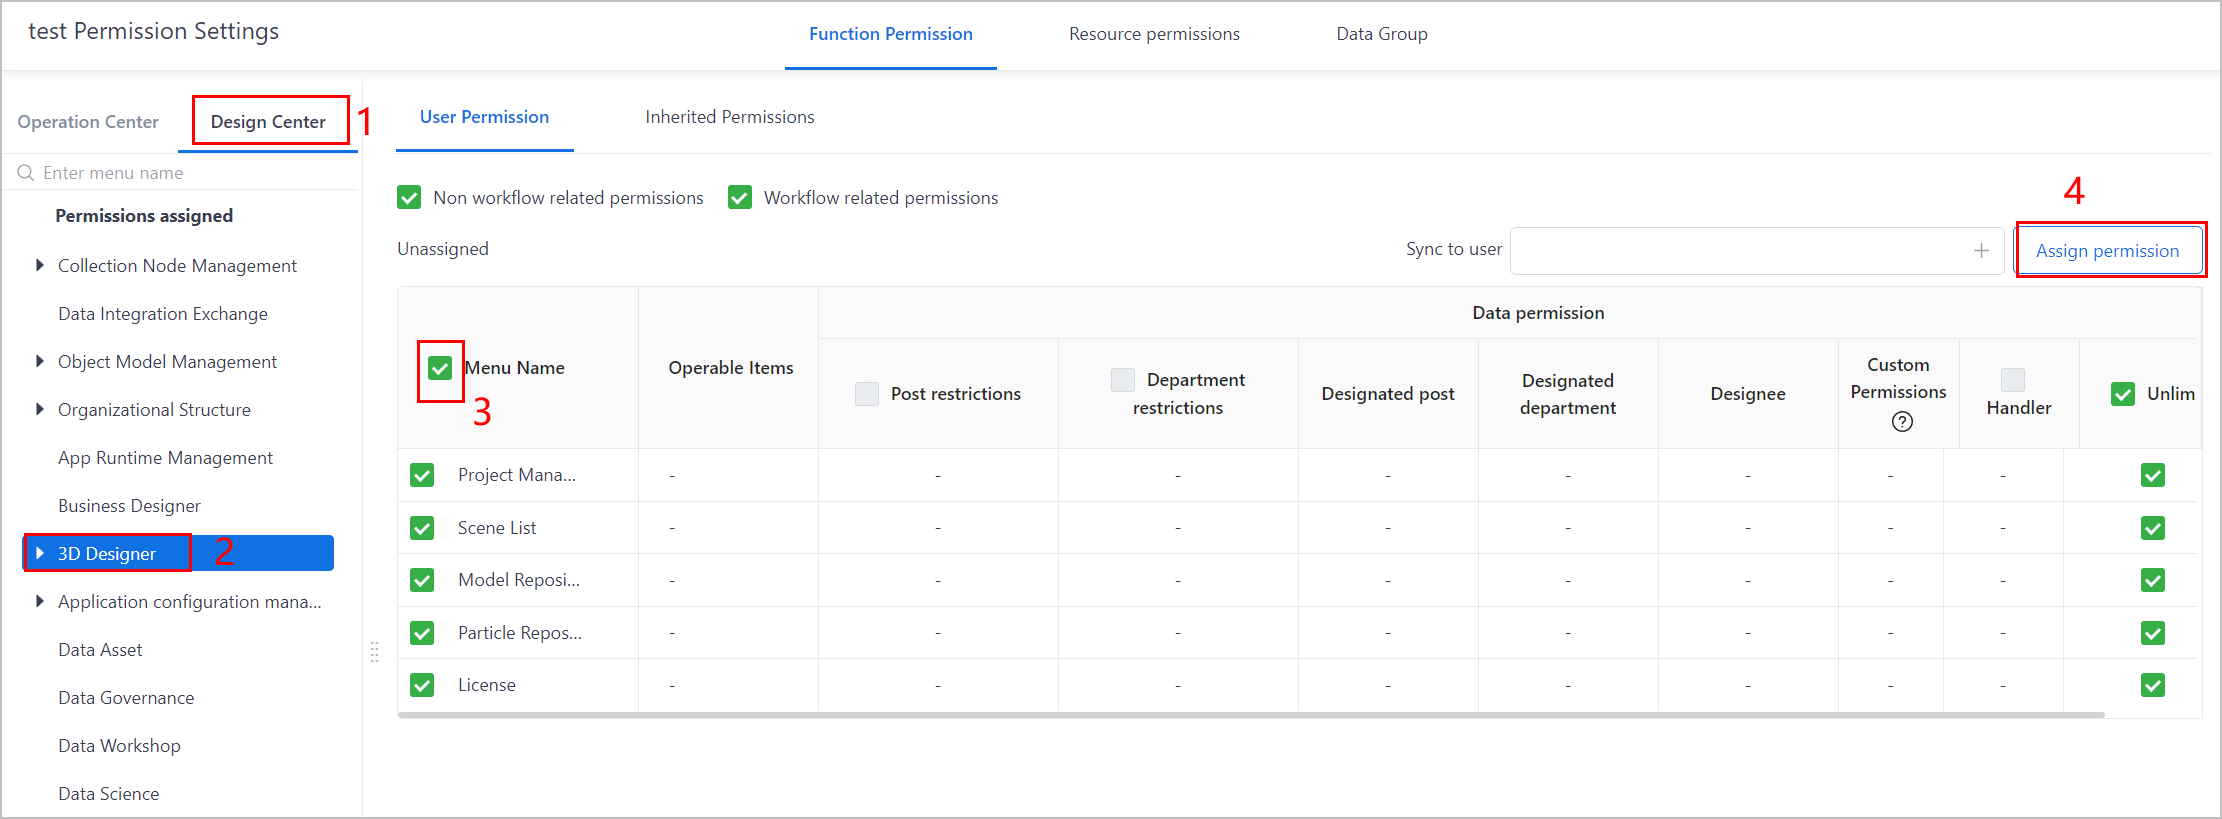
- Log in to the account you just assigned permission to, and check whether 3D Designer is listed on the menu list in design center.
Getting License
- Select 3D Designer > License, and then download the Machine Code.
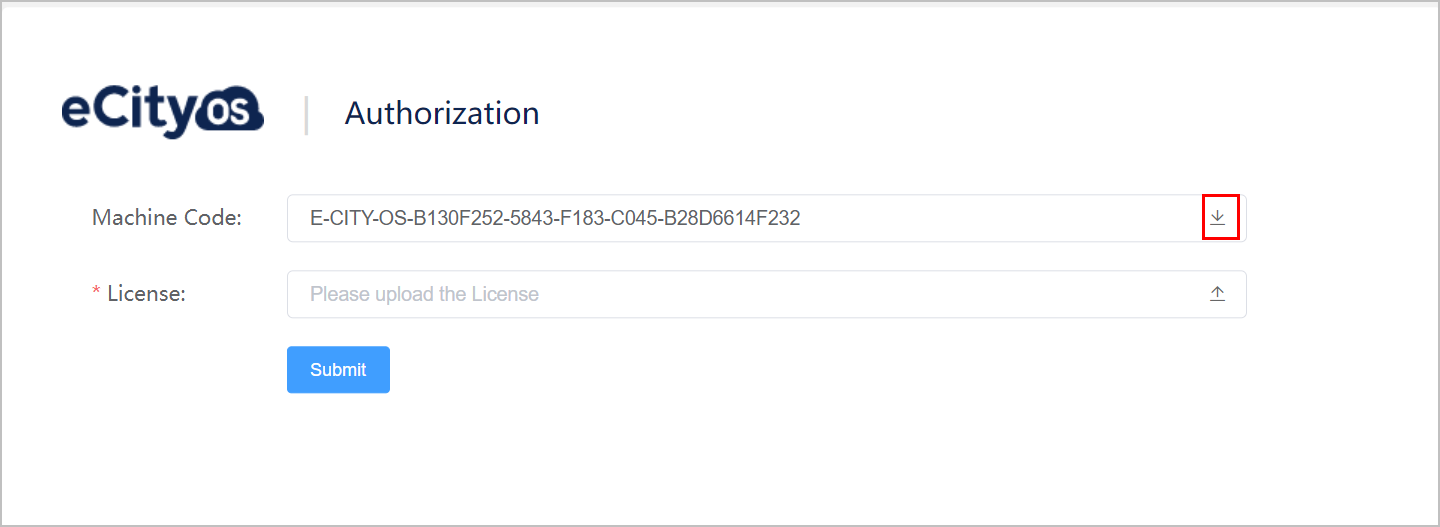
- Send the machine code file to technical support to get the license and token.
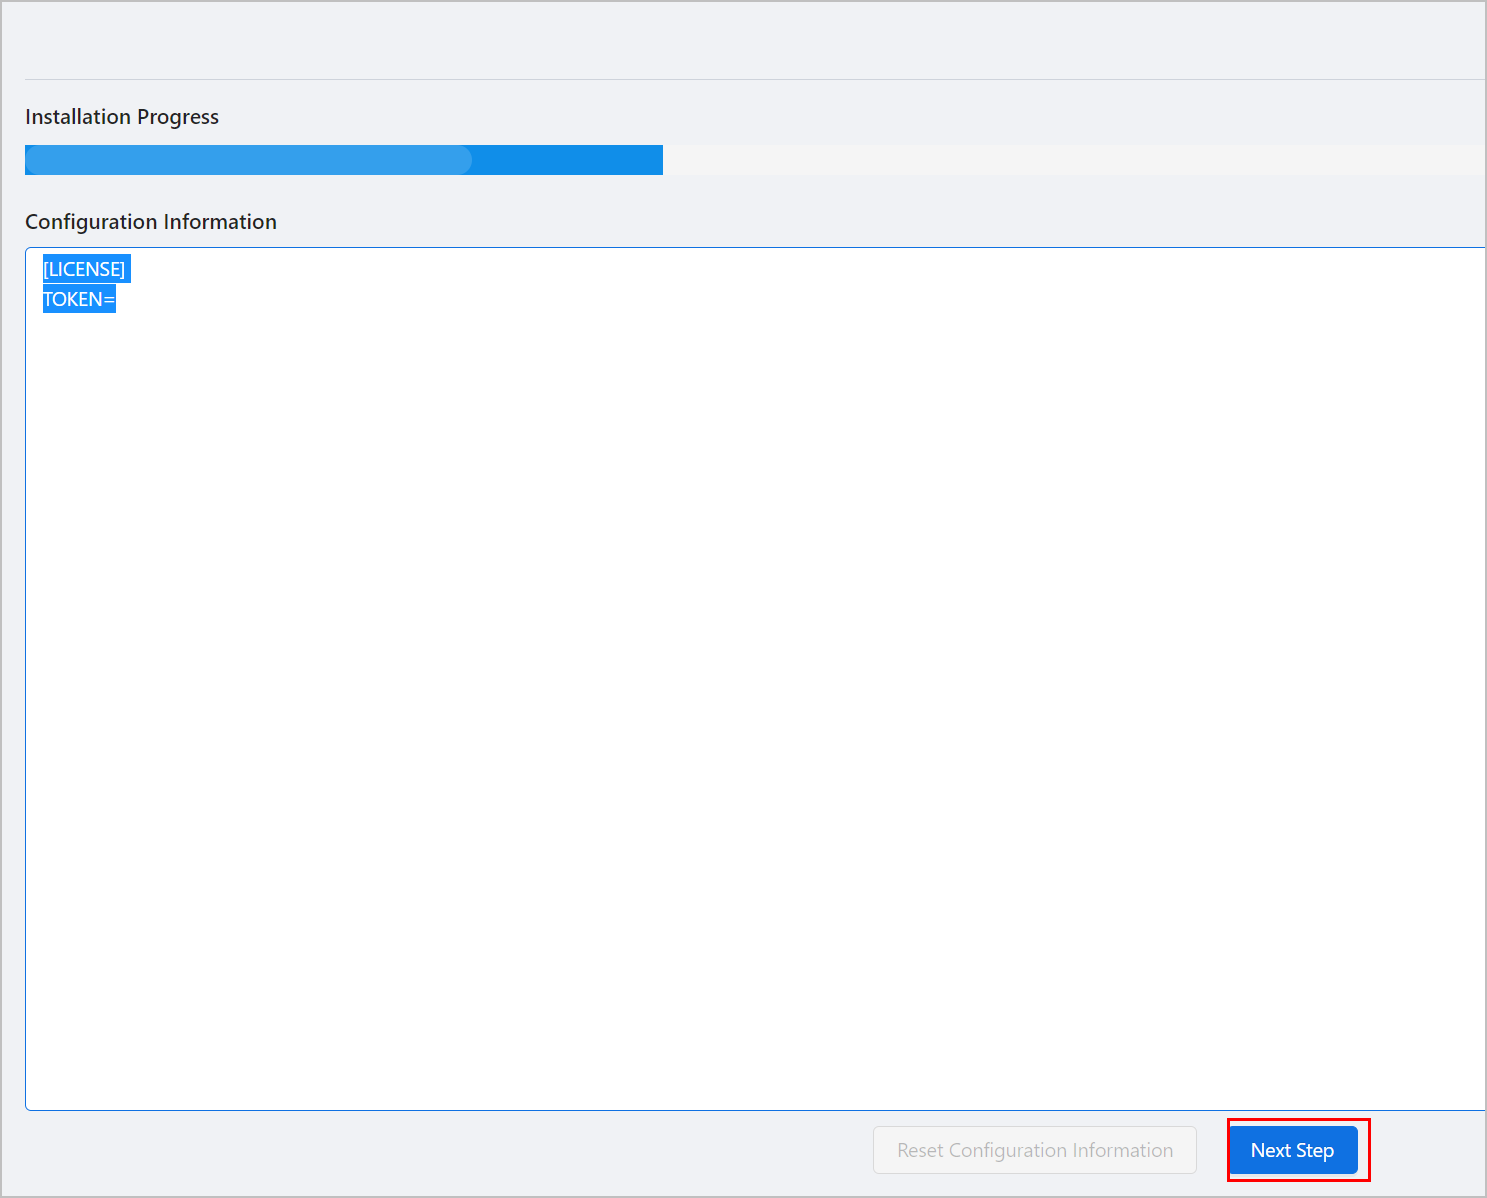
- Upload the license to 3D Designer, and then click Submit.
- Select App Runtime Management, and then click Update Configuration under Operation corresponding to 3D Designer.
- Change the token to what you got from technical support in the prompted window, and then click Update Configuration.
