Connecting RTD Collector
To connect a real-time data, video streams or alarm data to supOS, you need to perform operations shown as the figure below.

info
- Different collectors require different but similar configuration, and RTD collector is used as an example.
- Add a data source under Global Configuration > Local Storage which stores alarm data before adding an alarm collector.
Adding Collector
- Log in to supOS, and then click
 at the upper-right corner to go to the design center.
 - Select Collection Node Management > Authentication.
- Click
 , and then enter the corresponding information to add a collector.
 - Set the Type to Common Collector, and select the Timestamp to be recorded in the data.

- Click OK.
Authenticating Collector
Use the UUID generated on supOS, authenticate and connect supOS with the collector.
- Log in to X-Collector, and then select RTD Collector > Connection Info.what you might be interested
One collector can upload data to up to 5 supOS platforms simultaneously.
- Click Add, and then enter supOS information.
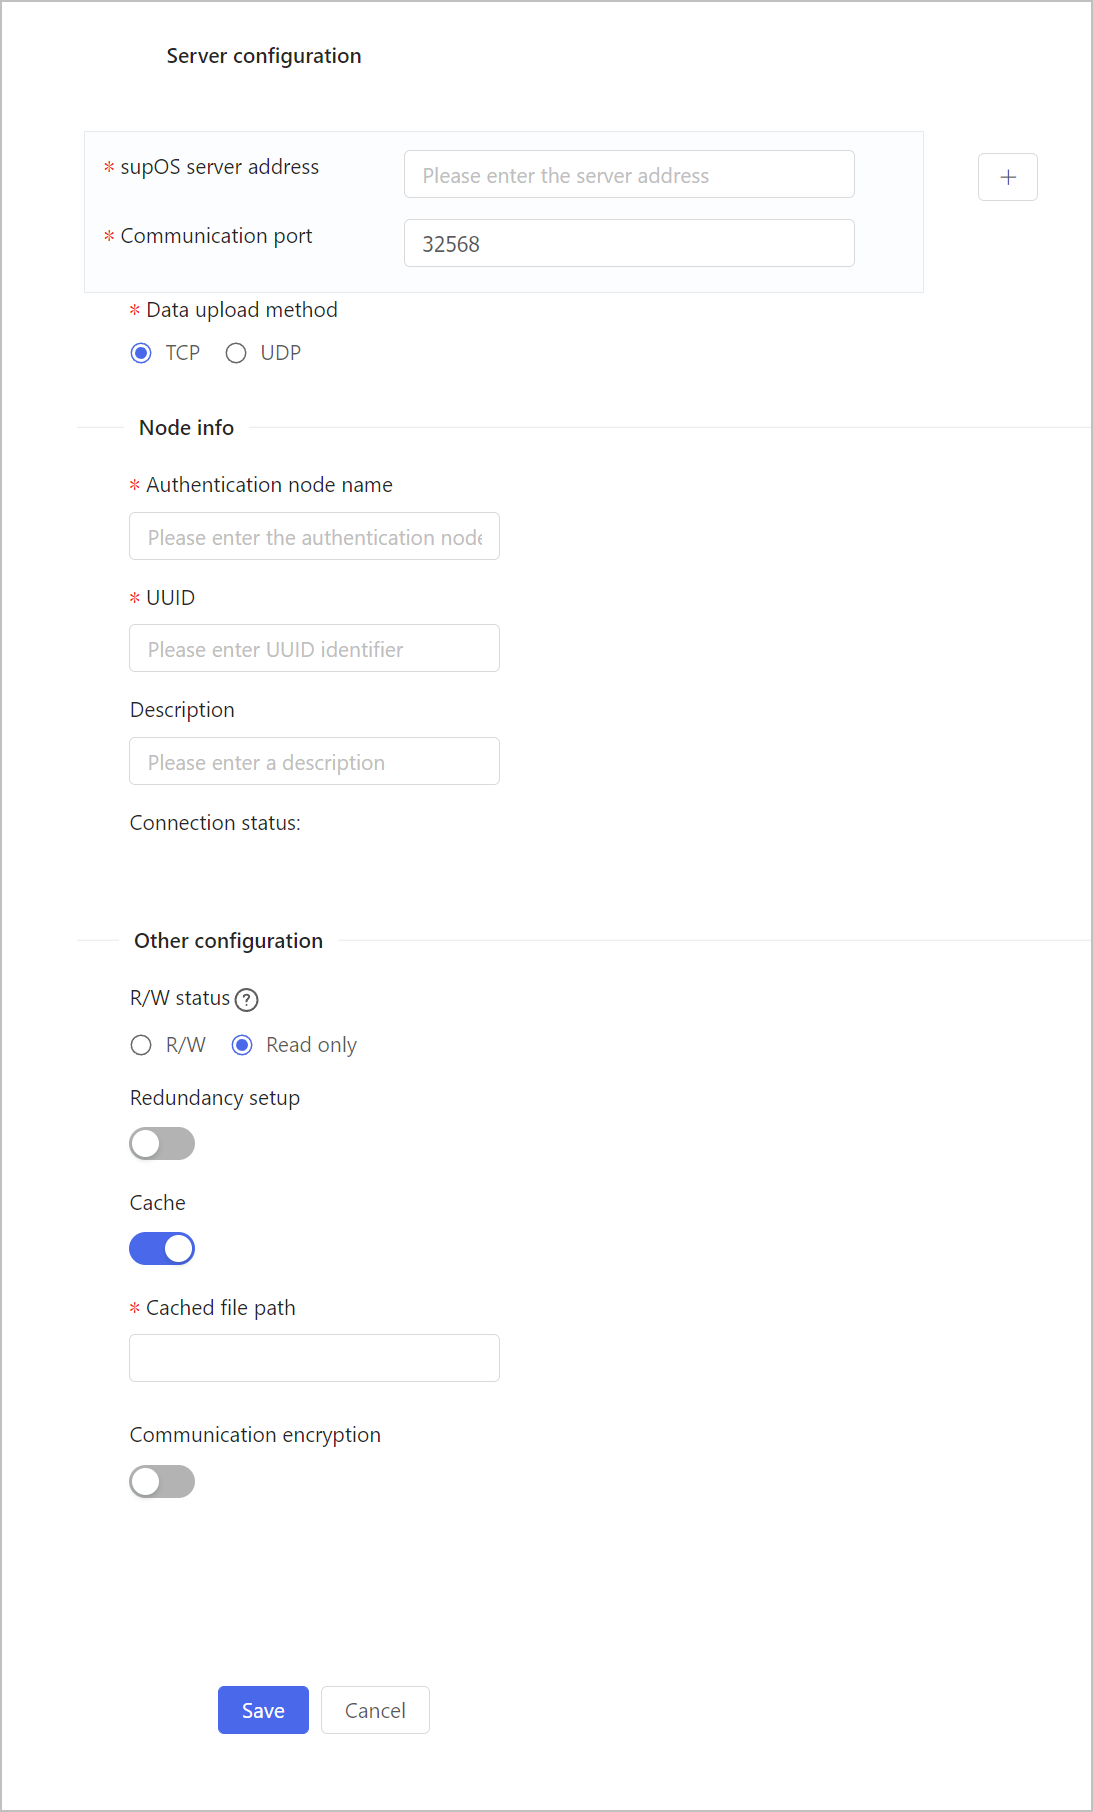
| Section | Parameter | Description |
|---|---|---|
| Server configuration | supOS server address |
info Only TCP protocol is supported. |
| Communication port | Leave it as default. Ports are different depending on data upload method. | |
| Data upload method | Select from TCP and UDP. | |
| Node info | Authentication node name | Enter the collector name you created on the supOS platform. |
| UUID | Enter the collector UUID generated on the supOS platform. | |
| Connection status | Displays the connection status between the collector and supOS. It is Success after authorization on supOS. | |
| Other configuration | R/W status | Set the global read and write status of the collector. You can set different status for each supOS. tip To write data back to equipment, set it to R/W. |
| Redundancy setup | Set whether to enable redundancy for the collector and enter group ID and number if enabled.
info Make sure other information such as server address, port, authentication node and UUID are the same for both collectors. | |
| Cache | Automatic network replenishment. Enable it and set a path for data storage during network failure. info
| |
| Communication encryption | Enter the key generated after enabling encryption during adding collector on supOS to encrypt communication information between supOS and X-Collector. info When the key is changed on supOS, the change takes effect after changing it on X-Collector. |
 to add and enter up to 5 server addresses in the cluster.
- Click Save.
info
Deletion is prohibited when there is only one supOS platform connected.
Authorizing Collector
- Log in to supOS, and then click at the upper-right corner to go to the design center.
- Select Collection Node Management > Status.
- Select the collector you just added, view the details and then click OK.
- The collector is connected, and a new instance is created under Object Model Management > Object Instance > Entity Template > Collector Template.
- An Online property with data type as Bool is generated under the instance, and you can use it in APP designing to indicate collector status (true means online and false is offline).
info
- Video collector that is added to supOS platform generates a new instance under Object Model Management > Object Instance > Entity Template > Video Template.
- Alarm collector that is added to supOS platform generates a new instance under Object Model Management > Object Instance > Entity Template > AE Template.