User Management
Add users based on the post and assign corresponding permissions to achieve easy management.
Adding User
- Log in to supOS, and then click
 at the upper-right corner to go to the design center.
 - Select User Security Management > User Management, and then click New.
- Select a user type and then enter the information.
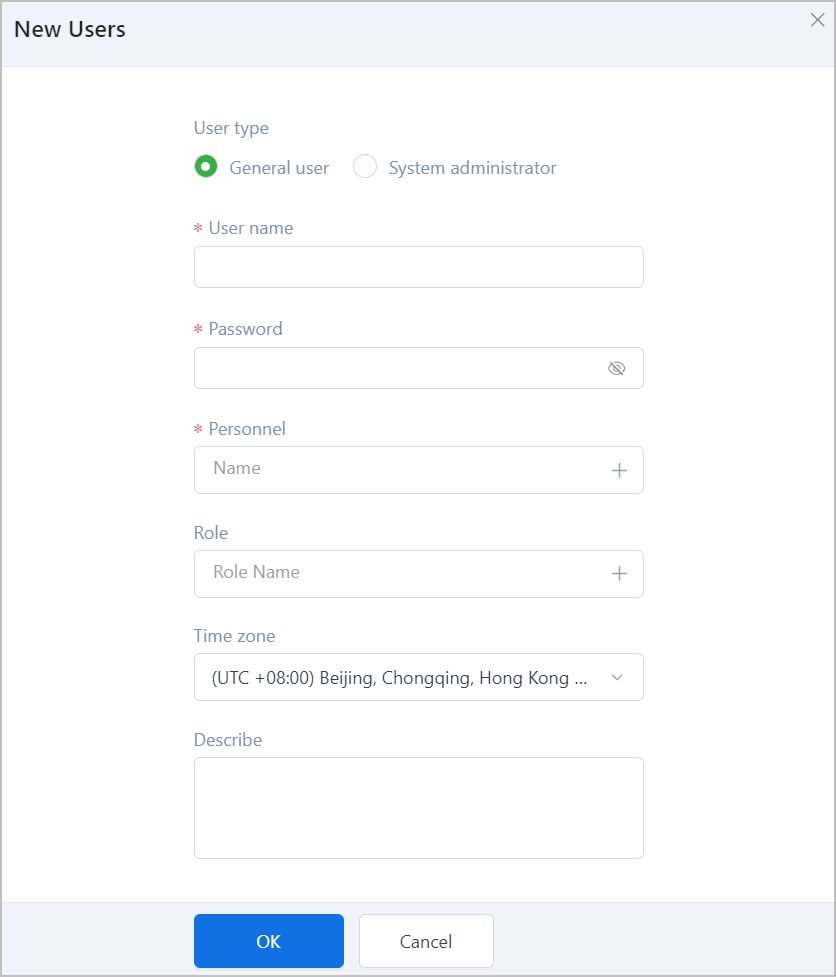
| Parameter | Description |
|---|---|
| User Type |
tip
|
| Username | Set the login username and password. info
|
| Password | |
| Personnel | Select a personnel from the company organization. |
| Role | Select a role for the user. All permissions of the role are assigned to the user and cannot be changed. |
| Time Zone | Select the time zone where the user is located. |
| Describe | User description. |
- Click OK.
- Import user
- Click
 and select Download Template.
 - Fill in the template as required, and then click and select Import.
- Select the filled template, and upload it to the supOS platform.
- Click
- Export user: Click Export, select the scope of export on the pop-up window and then click OK.
- Edit user: Under Operate, click Edit.
- Delete user: Select users and click
 , or click Delete under Operate to delete the corresponding user.
 - Lock/unlock user: Click the icon under Status to lock/unlock the corresponding user.info
The current user and admin cannot be manually locked.
- Reset password: Click Change Password under Operate, and change the password.
Assigning Permission
Aside from the permissions of the role, you can assign extra permissions to the user.
- Admin can only assign permissions to users in the same company.
- Branch admin can only assign APP permissions to user after the system admin assigns APP permission to the branch.
- Log in to supOS, and then click at the upper-right corner to go to the design center.
- Select User Security Management > User Management, and then click Permission under Operate of a user.
- Select permissions for the user under Function Permission.
tip
- Click
 next to Sync to user, you can select users in the company and assign the selected permissions to them. Up to 10 users and 50 permission can be assigned at the same time.
 - Permissions are compatible with the ADP platform operations according to configurations including post and department restrictions, specified post, department and personnel, and handler.
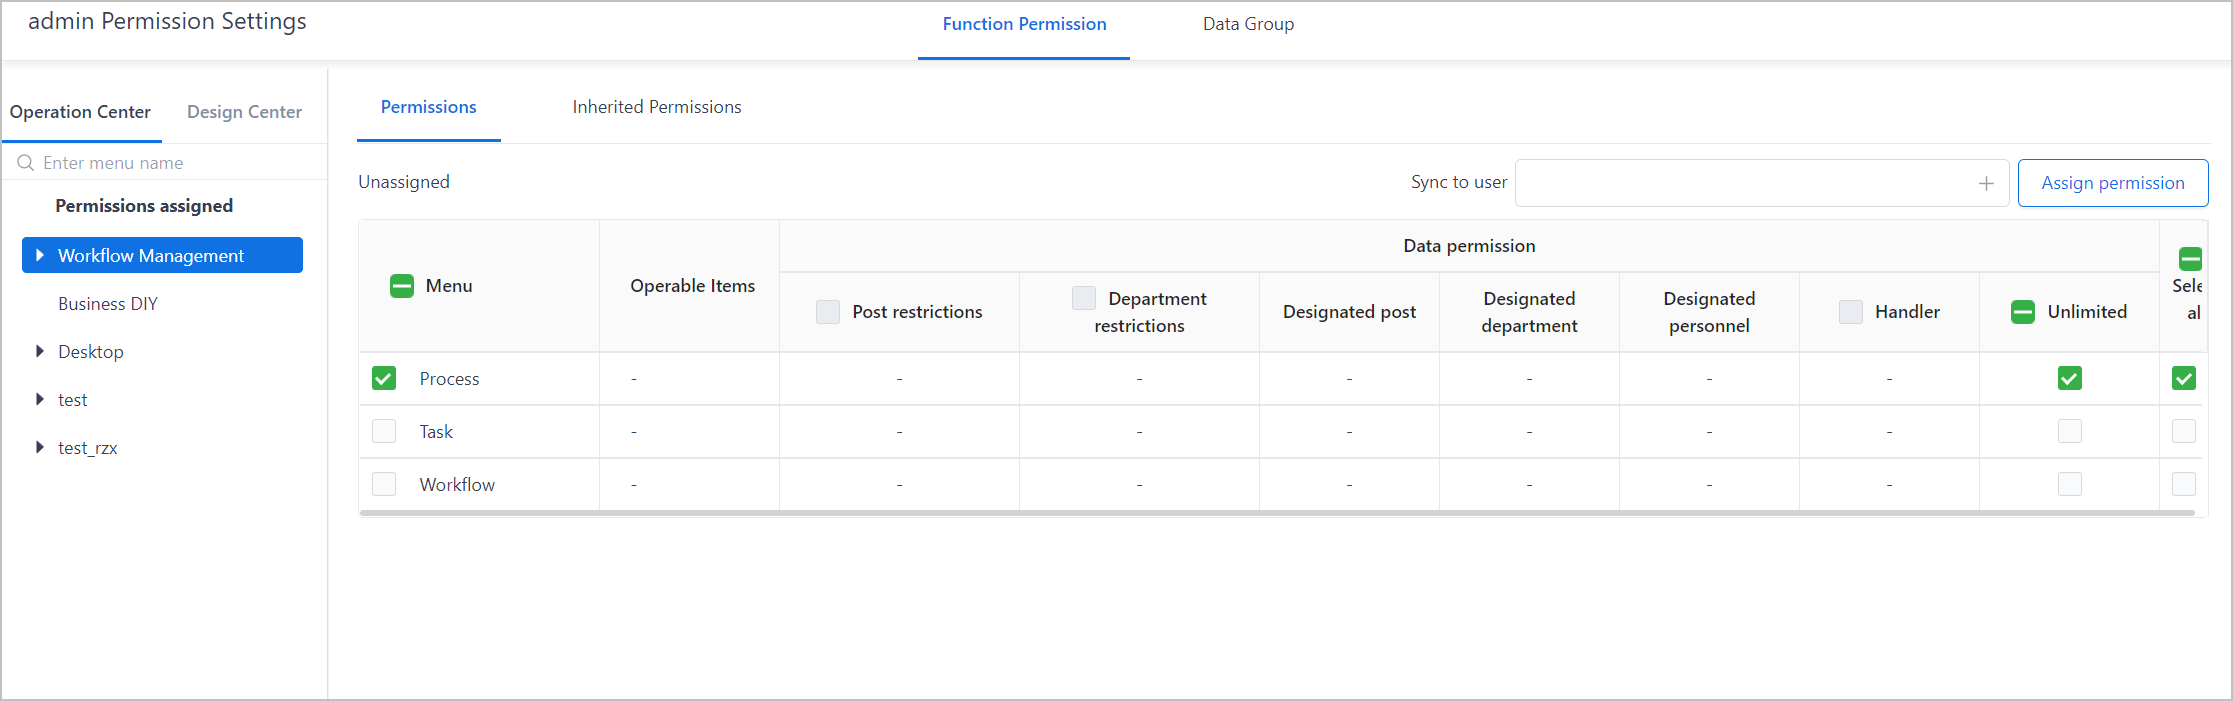
| Parameter | Description |
|---|---|
| Function Permission | The system permissions of the supOS platform.
|
| Permissions | Permissions manually assigned to the user. |
| Inherited Permissions | Permissions inherited from the role. |
Click Assign Permission at the upper-right corner.
tipYou can select an assigned permission, and drag it to the trash bin at the upper-right corner to delete it.
Click the Data Group tab.
- Resource Controlled: Assign data permissions based on the selected data group. It is the default option for all general users.
- Resource Uncontrolled: Assign all data permissions. It is the default option for admin.
info
Permissions here are linked with those of the object model management.
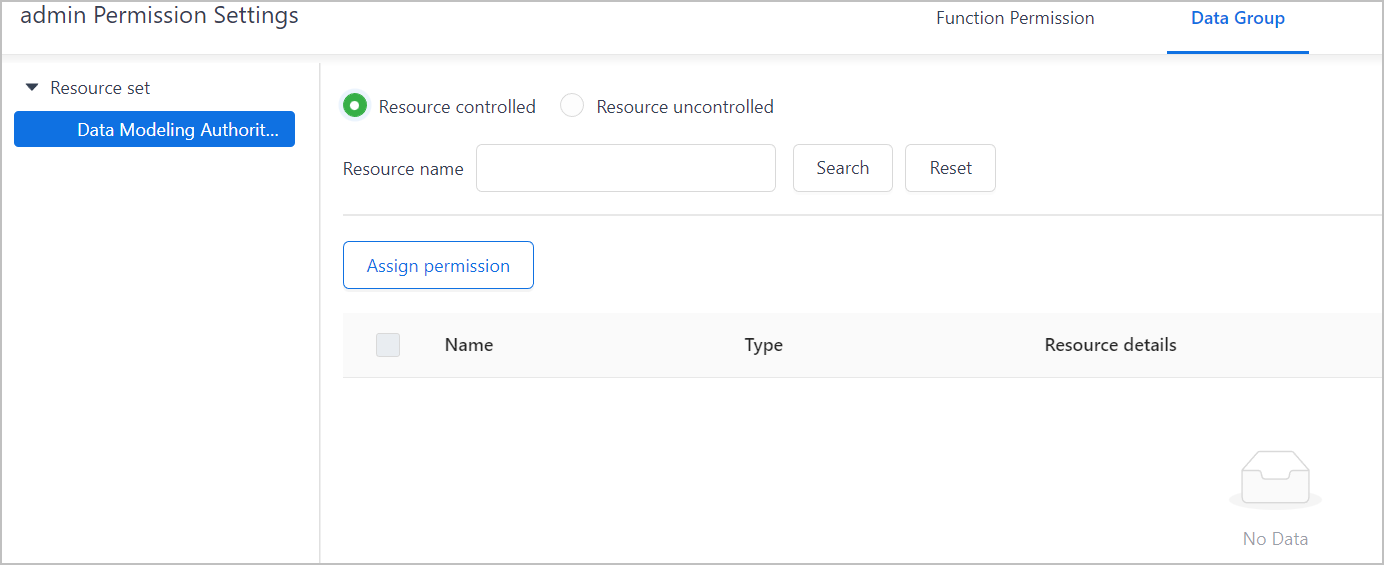
- Select the data modeling permission, and then click Assign Permission.